10 Tips for Choosing a Laser Cutter Engraver?

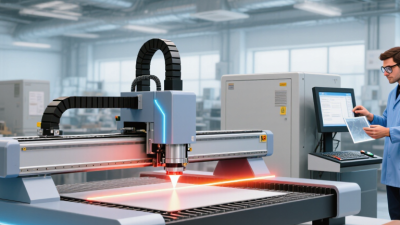
Choosing a laser cutter engraver is not simply a matter of selecting the highest wattage. The right machine must match your materials, workspace, skill level, and production goals. A compact diode model may suit wooden signs and leather gifts, while a CO2 machine handles acrylic and thicker materials more efficiently. Fiber systems serve different metal-marking needs.

I have seen buyers focus on speed and overlook ventilation, software compatibility, and replacement costs. That mistake can become expensive. A machine that looks powerful online may feel limited in a small workshop. Measure your available space. Check the working area. Review the manufacturer’s safety guidance before comparing features.

This guide presents ten practical tips for choosing a laser cutter engraver with greater confidence. It considers laser type, cutting thickness, engraving quality, accuracy, cooling, exhaust systems, and technical support. It also examines certifications and responsible material use. Never process unknown plastics or materials that can release dangerous fumes. Safety matters more than convenience.

Expect trade-offs. No machine does everything perfectly. A lower-cost model may require more manual adjustment. A professional system may exceed a beginner’s needs. Some recommendations may change as technology improves. Therefore, compare verified specifications with real user experiences and, when possible, inspect sample cuts personally. Small details matter: clean edges, stable focus, quiet airflow, and consistent results across repeated jobs. Take your time. The best choice is reliable, suitable, and safe for your actual work.
10 Tips for Choosing a Laser Cutter Engraver?

Define Your Cutting and Engraving Requirements

Before choosing a laser cutter engraver, define exactly what you plan to make. List your regular materials, including wood, acrylic, paper, leather, or coated metal. Each material reacts differently to heat. Some release harmful fumes, so compatibility and ventilation require careful checking. Never rely on guesswork.

Measure your largest planned project, not your smallest sample. Record the material thickness, cutting area, engraving detail, and expected production volume. A machine for small ornaments may struggle with furniture panels. If you need fine lettering, test lines, curves, and tiny gaps. If you need cutting, check whether one pass is realistic. Multiple passes can increase scorching and reduce accuracy.

Think about your working habits, too. A beginner may value simple controls more than maximum power. A workshop handling repeat orders needs stable alignment, consistent output, and accessible maintenance. I once underestimated setup time and focused too much on advertised cutting speed. That was a poor measurement. Actual results depend on material quality, focus, air assistance, and operator skill. Prepare a small test file before purchase. Include your thickest material and smallest engraving detail. Keep the results, settings, and failures in a record. That evidence will guide a more reliable choice than impressive specifications alone.

Compare Laser Types, Power Levels, and Working Areas

10 Tips for Choosing a Laser Cutter Engraver

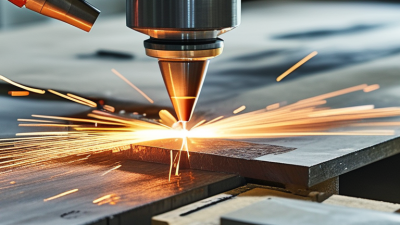
Choosing a laser cutter engraver starts with the material, not the advertised wattage. A CO2 source, commonly 10.6 micrometres, suits wood, acrylic, leather, and many nonmetals. Fiber systems near 1.06 micrometres usually process metals more efficiently. Diode systems can be economical for engraving, but their cutting depth is often limited. Match wavelength to material. Confirm tested thickness, not a maximum claim.

Power must match production. The 2023 Laser Cutting Machine Market report by MarketsandMarkets estimated the global market at 7.3 billion dollars and projected 10.4 billion by 2028. That growth reflects adoption, not proof that higher power is better. Compare speed using identical material, thickness, and edge-quality targets. Check minimum controllable power for fine engraving. Examine pulse control and air-assist compatibility. More power can char wood. It can also waste energy.

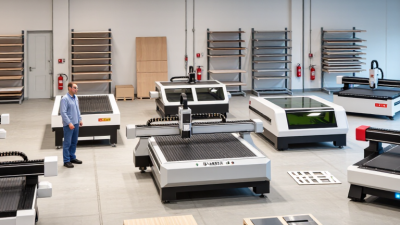
Working area changes workflow more than many buyers expect. Measure your largest sheet, then leave clearance for jigs and ventilation. A 400-by-400-millimetre bed may suit small projects, while sign work needs a longer axis or pass-through design. Check Z-height for rotary attachments and uneven stock. Review lens options and focal distance. Require enclosure, interlocks, extraction, and documented alignment with ISO 11553-1:2020. Test real samples. Results vary. Record kerf, smoke, and repeatability before committing; one showroom sample is not enough.

10 Tips for Choosing a Laser Cutter Engraver

Compare laser types, power levels, and working areas before buying. Diode lasers commonly provide about 5–20 W of optical output and are suitable for engraving and thin wood or acrylic. CO₂ lasers commonly range from 40–150 W and are better suited to cutting non-metal materials. Fiber lasers commonly range from 20–60 W and are designed primarily for marking and engraving metals. Typical working areas are approximately 400 × 400 mm for diode machines, 400 × 600 mm for CO₂ machines, and 110 × 110 mm for fiber marking machines. Actual performance depends on lens quality, material, speed, focus, and ventilation.

Check Material Compatibility and Machine Performance

10 Tips for Choosing a Laser Cutter Engraver

Check Material Compatibility and Machine Performance

Material compatibility should guide your purchase more than appearance or price. A laser that cuts plywood may only mark acrylic cleanly. CO2 systems usually handle wood, acrylic, cardboard, and some fabrics well. Diode systems can suit thin wood and coated surfaces. Fiber systems are designed for many metals. Always confirm the manufacturer’s approved material list before testing.

Request sample results, not just power ratings. A higher wattage does not guarantee cleaner edges. Check the working area, cutting thickness, spot size, speed range, and focus adjustment. For repeated work, examine air assistance, exhaust performance, cooling, and software stability. These details affect smoke marks, warped edges, and production delays. Try a small test grid using your own material. Results can change between suppliers.

I once assumed a powerful machine would solve every cutting problem. It did not. Dense plywood produced dark edges, while thin sheets warped under heat. That experience changed my testing process. Measure kerf width, engraving depth, and repeatability across several samples. Leave room for error. Some materials contain coatings or adhesives that release harmful fumes, so verify their composition and use suitable ventilation. A reliable seller should provide safety data, maintenance guidance, and realistic performance limits rather than vague promises.

Evaluate Safety Features, Software, and Ease of Use

Choosing a laser cutter engraver requires more than comparing cutting speed or advertised power. Safety features should guide the decision. Look for a fully enclosed work area, a reliable lid interlock, an accessible emergency stop, and visible status indicators. Proper exhaust is essential because cutting materials can release harmful fumes. The machine should also include clear limits for approved materials. Never assume that every sheet is safe to process.

Software affects daily work as much as hardware. Test whether it accepts common design files and shows a preview before cutting. Useful controls include adjustable speed, power, focus, origin, and repeat-job settings. A clear interface reduces mistakes when aligning a small wooden tag or engraving a detailed metal plate. Software updates should be documented, and backup options are helpful when an update causes problems. Test the workflow.

Ease of use appears in small details. Can you adjust the bed without special tools? Is the focus procedure explained with pictures? Are cleaning points, lens care, and filter replacement easy to understand? A short setup time is valuable, but simple controls should not hide important warnings. I would inspect the manual before buying, not after an error occurs. Some machines look beginner-friendly yet require frequent calibration. That difference matters in real work. A careful trial with scrap material can reveal uneven alignment, confusing menus, or weak ventilation before production begins.

10 Tips for Choosing a Laser Cutter Engraver: Evaluate Safety Features, Software, and Ease of Use
Tip Evaluation Area What to Evaluate Practical Verification Recommended Selection Benchmark
1 Enclosure and Interlock Safety A fully enclosed working area helps limit exposure to laser radiation, smoke, sparks, and moving parts. Confirm that the enclosure blocks direct viewing of the beam and that opening the access door pauses or stops the laser operation. Priority: Critical
Choose a model with a certified enclosure, door interlock, and clearly documented safety behavior.
2 Emergency Stop and Fault Protection A clearly accessible emergency-stop control allows the operator to interrupt motion and laser output quickly during abnormal operation. Locate the emergency-stop button before purchase and review protection against overheating, cooling failure, limit errors, and abnormal power conditions. Priority: Critical
Require an accessible emergency stop, fault alerts, and automatic shutdown or laser inhibition for major faults.
3 Ventilation and Fume Extraction Laser processing can release smoke, fine particles, and hazardous gases depending on the material being cut or engraved. Check whether the machine includes an exhaust port, filtration option, airflow specification, and instructions for safe venting. Priority: Critical
Use dedicated exhaust ventilation or an appropriate filtration system; never process unknown or prohibited materials.
4 Material Compatibility Different laser wavelengths and power levels are suitable for different materials, while some plastics can release corrosive or toxic fumes. Compare the manufacturer’s approved-material list with your actual materials, such as wood, paper, leather, acrylic, or coated metals. Priority: Critical
Select equipment with a documented material matrix and avoid materials containing chlorine, PVC, or other restricted substances.
5 Software Compatibility Software affects design workflow, file preparation, machine control, and the ability to repeat production jobs accurately. Verify support for common vector and raster formats, including SVG, DXF, PDF, PNG, JPG, and common design-software workflows. Priority: High
Prefer software that supports vector cutting, raster engraving, layer settings, power and speed controls, and job preview.
6 Ease of Setup and Calibration Simple alignment, focusing, and calibration reduce setup time and improve engraving consistency. Review the setup guide and confirm whether focus adjustment, bed leveling, optical alignment, and test patterns are clearly explained. Priority: High
Choose a machine with guided calibration, repeatable focusing, clear documentation, and accessible maintenance points.
7 Work Area and Material Capacity The usable bed size determines the maximum project dimensions and affects how efficiently sheets or batches can be processed. Measure your typical workpieces and compare them with the usable—not merely advertised—cutting area and maximum material thickness. Priority: High
Allow additional clearance around common designs and confirm whether pass-through processing is needed for larger sheets.
8 Accuracy, Repeatability, and Motion Control Mechanical stability and controlled motion influence fine details, alignment, edge quality, and repeated production results. Run a test pattern containing small text, circles, straight lines, and repeated copies; inspect dimensional consistency and edge alignment. Priority: High
Evaluate published accuracy claims together with real test results; repeatability matters more than a single advertised resolution figure.
9 Cooling, Duty Cycle, and Maintenance Stable cooling and routine maintenance help protect the laser source, maintain output consistency, and reduce downtime. Check cooling requirements, operating-temperature limits, maintenance intervals, consumable parts, cleaning procedures, and replacement availability. Priority: Medium-High
Match the duty cycle to your workload and choose a system with documented maintenance procedures and readily available service parts.
10 Training, Support, and Total Cost Purchase price alone does not reflect ventilation, software, maintenance, safety equipment, training, and downtime costs. Calculate the complete ownership cost and assess the quality of manuals, tutorials, troubleshooting resources, warranty terms, and technical support. Priority: High
Choose the option that meets safety and workflow requirements within the full first-year budget, not just the initial equipment price.

Review Total Costs, Maintenance, Support, and Warranty

A laser cutter engraver should be judged by ownership cost, not only its advertised price. Add installation, ventilation, software, electricity, replacement lenses, filters, and shipping. A cheaper machine can become expensive after several months. The sticker price misleads. Create a twelve-month budget before ordering, using realistic material waste and daily operating hours.

Maintenance directly affects accuracy and safety. Ask how often mirrors, lenses, rails, and cooling systems need inspection. Confirm whether replacement parts are locally available and clearly priced. In a small workshop, a blocked air path or dirty lens can ruin a detailed job within minutes. Keep a maintenance log with dates, photographs, and unusual noises. I once underestimated cleaning time, and production slowed more than expected.

Support quality matters when settings fail or errors appear. Check response times, training options, repair procedures, and technical documentation. Request a sample troubleshooting guide before purchase. A useful warranty should state coverage periods, labor terms, shipping responsibility, and excluded parts. Read the exclusions. Consumables may not be covered, while damage from poor maintenance could void protection. Ask whether support continues after the warranty ends, and compare the hourly cost of downtime. A reliable supplier should answer specific questions without vague promises. If the warranty wording feels unclear, pause and seek written clarification.