10 Tips for Laser Engraving Metal?

Laser engraving metal looks precise on a computer screen, yet the workshop tells a less tidy story. Stainless steel can turn blue, aluminum may appear pale, and a polished surface can reflect the beam unpredictably. This guide, “10 Tips for Laser Engraving Metal,” focuses on practical control rather than impressive machine specifications. It examines material testing, lens selection, focus distance, marking speed, power balance, and surface preparation. Small changes matter. A fingerprint can alter the finish.

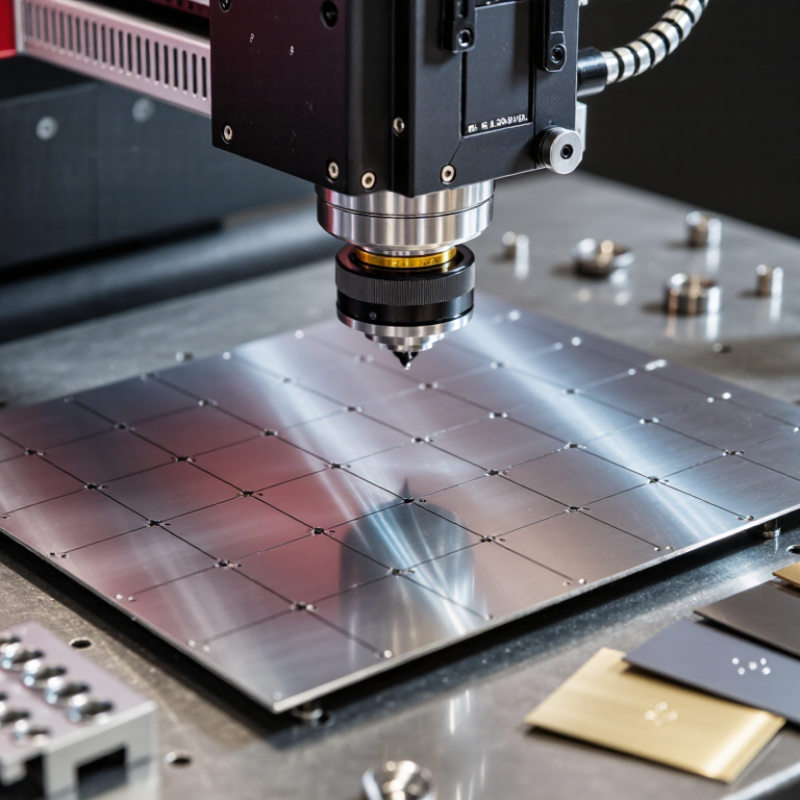
David Belforte, a respected laser-industry analyst and author, has emphasized a principle that applies here: “Process stability matters more than peak power.” That idea deserves attention. High wattage cannot repair poor focus or incorrect settings. A simple test grid often reveals more than guesswork. Mark several squares on scrap metal, then compare contrast, depth, heat tint, and edge sharpness under consistent lighting. Record the settings. Do not trust memory.

The article also considers stainless steel, anodized aluminum, brass, coated materials, and thin sheet metal. Each responds differently. Some results may look acceptable at first, then fade after cleaning. That is easy to miss. Cleaning the surface with a suitable degreaser, securing the workpiece, and checking ventilation can improve repeatability and workshop safety. Protective eyewear and manufacturer-approved guarding remain essential. Never engrave an unidentified coating. It may release hazardous fumes. Even experienced operators make weak assumptions. A careful test, a written note, and one honest review of the finished mark can prevent an expensive mistake.
10 Tips for Laser Engraving Metal?

Choosing the Right Metal and Laser Engraving Method

10 Tips for Laser Engraving Metal

Choosing the Right Metal and Laser Engraving Method

Metal choice controls the result more than many beginners expect. Bare stainless steel usually produces clean, durable marks with a pulsed fiber laser. Aluminum behaves differently. Anodized aluminum often gives strong contrast, while untreated aluminum may need more power or a marking compound. Mild steel can engrave well, but oxidation may appear around deep cuts.

Match the method to your goal. Use surface marking for serial numbers, logos, and fine text. Choose deeper engraving when the design must survive repeated abrasion. For stainless steel, a low-power annealing pass can create dark contrast without removing much material. Always test a small sample first. Settings are not universal. Thickness, finish, alloy, and surface oil all change the outcome.

I measure line spacing with a ruler and inspect edges under bright light. A clean mark should have consistent depth and minimal heat discoloration. Keep the metal flat and firmly supported. Even slight movement can blur thin lettering. Ventilation matters when coatings or painted surfaces are involved. Remove unknown coatings carefully, since fumes can be hazardous.

I once trusted a preset and ruined a brushed aluminum panel. The mark looked acceptable on scrap, but not on the final piece. That mistake changed my process. Now I record speed, power, focus, passes, and test results for every alloy. Some experiments still fail. That is useful information, not wasted material.

Preparing the Surface for Clean, Consistent Engraving

10 Tips for Laser Engraving Metal

Preparing the Surface for Clean, Consistent Engraving

Surface preparation often controls the final mark more than laser power. Fingerprints, oil, oxide, and dust can scatter energy and create uneven contrast. In practical shop testing, a clean stainless-steel coupon usually produces sharper edges than an untouched one. Small contamination matters.

Tip 1: Degrease the metal with a residue-free cleaner and a lint-free wipe. Let it dry completely. Do not engrave a damp surface. Tip 2: Remove loose oxide and scale using a suitable abrasive pad. Keep the motion consistent. Tip 3: Measure roughness when repeatability matters. ISO 21920-2:2021 specifies parameters such as Ra, reported in micrometres, for describing surface texture. Record the value beside each test result.

Tip 4: Keep the workpiece flat and firmly supported. A slight angle changes the focus across the marking area. Tip 5: Use the same cleaning process for every batch. The 2023 World Manufacturing Forum report identifies process consistency as a major requirement for reliable digital manufacturing. That principle applies here, even to small parts. Tip 6: Test a hidden area first. Some coatings react unpredictably. Tip 7: Inspect under angled light before changing laser settings. I sometimes blame power too quickly; contamination is often the real problem. Tip 8: Wear appropriate eye protection and control airborne residue. NIOSH notes that engineering controls should manage hazardous workplace exposures before relying only on personal protective equipment. Surface preparation should be careful, not rushed.

10 Tips for Laser Engraving Metal? – Preparing the Surface for Clean, Consistent Engraving

Tip Surface Preparation Recommended Materials or Settings Why It Helps Important Caution
1. Remove oil and fingerprints Wipe the metal with a clean, lint-free cloth before marking or engraving. Use isopropyl alcohol or a suitable metal-safe degreaser. Removes contaminants that can cause uneven color, residue, or inconsistent energy absorption. Allow the surface to dry fully, and keep flammable solvents away from the active laser area.
2. Remove rust and loose oxidation Brush or lightly abrade rusty areas until the surface is stable and reasonably uniform. Use a nylon abrasive pad or fine stainless-steel brush where appropriate. Creates a more consistent starting surface and reduces flaking during engraving. Do not use a carbon-steel brush on stainless steel if iron contamination could be a problem.
3. Smooth deep scratches Blend deep machining marks or scratches before engraving detailed artwork. Wet-sand progressively, commonly starting around 240–320 grit and finishing near 400–600 grit when a smoother finish is required. Reduces visual noise and helps fine lines appear more uniform. Keep sanding direction consistent if a visible brushed finish is desired.
4. Preserve the intended grain For brushed metal, clean and lightly abrade in the same direction as the existing grain. Use a fine abrasive pad or fine-grit abrasive paper. Maintains a consistent background texture around the engraved design. Cross-sanding can create visible marks that remain after engraving.
5. Remove abrasive residue After sanding or brushing, remove all dust and particles from the workpiece. Use a soft brush, oil-free compressed air, and a final lint-free wipe. Prevents loose particles from producing dots, specks, or unwanted surface marks. Wear suitable eye protection when using compressed air.
6. Check flatness and stability Place the metal securely and confirm that the engraving area is not rocking or bowed excessively. Use a level fixture, clamps, or a suitable jig; keep clamps outside the travel path. Maintains a more consistent focal distance and reduces vibration-related defects. Avoid excessive clamping force, which can deform thin sheet metal.
7. Mask areas that must stay clean Cover surrounding areas when smoke, dust, or coating residue could affect the finish. Use laser-compatible marking tape or a thin protective film approved for the process. Limits residue outside the artwork and can simplify cleanup. Test the masking material first; some plastics release hazardous fumes or ignite.
8. Treat coated or painted metal correctly Clean the coating without sanding through it unless the design requires bare metal. Use a non-abrasive cleaner first; remove coatings only with a tested process. Preserves the coating and improves contrast when the laser is intended to remove only the top layer. Confirm the coating composition and ventilation requirements before laser processing.
9. Test a small sample area Prepare a hidden or scrap area using the same cleaning and finishing steps as the final part. Test speed, power, pulse frequency, focus, and line spacing according to the laser type and metal. Reveals how the actual alloy, finish, and surface texture respond before production. Do not assume identical-looking metals will engrave with identical parameters.
10. Perform a final inspection Check for oil, moisture, loose dust, burrs, and remaining protective film immediately before engraving. Use bright angled light and a lint-free cloth for the final visual check. Catches surface defects that can reduce contrast or interrupt fine details. Follow the laser system’s safety procedures, including approved shielding, ventilation, and eye protection.
Practical note: Surface preparation should be matched to the metal alloy, existing finish, coating, and laser wavelength. Always validate the process on a test piece before engraving the final part.

Setting Laser Power, Speed, and Focus Accurately

10 Tips for Laser Engraving Metal?

Accurate power, speed, and focus control decide whether metal looks crisp or scorched. In practice, I begin with a clean, degreased sample. Oil can create uneven marks and misleading test results. I set the lens at the manufacturer’s stated focal distance, then verify it with a focus ramp. A slight height error can widen the beam and soften fine lettering. Do not trust the screen alone. Measure the surface.

I create a small matrix using five power levels and five speed levels. Keep frequency, line interval, and pass count unchanged. This reveals the usable process window faster than guessing. For stainless steel, moderate power and slower motion may create dark annealed marks. Higher power can remove material, but excessive heat produces brown edges. Aluminum often needs different settings because its reflective surface changes absorption. The first test is rarely perfect. That is useful evidence, not failure. I record every result, including ugly ones.

Fortune Business Insights valued the global laser marking machine market at about USD 3.15 billion in 2023, showing how widely these processes are used. Technical control remains more important than market size. ISO 11553-1:2020 also emphasizes risk control for laser processing equipment. Use suitable extraction, enclosure, and eye protection for the laser class. Never adjust focus while the machine is actively firing. My practical rule is simple: change one variable, inspect the mark under angled light, and repeat.

Using Proper Safety Measures and Engraving Techniques

10 Tips for Laser Engraving Metal?

Using Proper Safety Measures and Engraving Techniques

Laser engraving metal demands preparation, not guesswork. Wear suitable eye protection, close the enclosure, and confirm its interlock works. Keep the workspace ventilated. Metal coatings may release unpleasant or hazardous fumes. Never engrave an unidentified finish. Ask the material supplier for its safety information.

Keep loose clothing and flammable items away. A suitable fire extinguisher should remain accessible. Do not leave the machine unattended.

Inspect the metal before starting. Polished surfaces can reflect the beam, so use approved shielding and follow the equipment manual. Secure the workpiece firmly. Even a small movement can blur fine lettering.

Set the focus carefully, then test the power and speed on scrap metal. Mark the test area. Record the settings that produce clean contrast without excessive heat.

Material Care Lower energy may protect thin parts from warping. Clean the surface with an appropriate method before engraving. Avoid unknown solvents.

I have learned that attractive preview images can mislead. My early passes looked sharp on screen but appeared uneven in steel. The cause was poor focus and inconsistent cleaning.

Slow down. Watch the first few seconds for smoke, sparks, or unexpected discoloration. Stop immediately if the material reacts strangely.

Inspect the result after cooling, then adjust one setting at a time. Document the material, finish, focus, and settings for repeatable work.

Some surfaces still resist perfect contrast, even with careful preparation. That limitation deserves attention, not a stronger setting.

Inspecting, Cleaning, and Preserving the Finished Engraving

A finished metal engraving deserves a careful inspection before cleaning. I check the lines under bright, angled light. This reveals uneven depth, rough edges, and tiny metal flakes.

Tip: Let the piece cool completely. Heat can hide surface defects and distort your judgment.

I also inspect corners with a magnifying lens. Deep marks should look consistent, not bruised or melted. A second inspection after several hours is useful. I once missed a shallow scratch because I inspected too quickly.

Cleaning should remove residue without softening the engraved details.

Tip: Begin with a soft, lint-free cloth. Wipe gently across the surface, then around the recessed lines. For oily fingerprints, use a small amount of mild soap diluted in water. Test it on an unseen area first.
Avoid abrasive pads and stiff brushes. They can round sharp edges and leave bright scratches.
Tip: Never flood narrow grooves. Trapped moisture may encourage staining, especially on untreated metal. Dry the piece immediately with a clean cloth.

Preservation depends on handling and storage conditions.

Tip: Wear clean gloves during final inspection. Skin oils can darken freshly cleaned surfaces.

Keep the engraving away from humidity, salt, and loose abrasive objects. A dry storage box with soft padding works well.

Tip: Photograph the surface before packaging. This creates a practical record for later comparisons.

Protective coatings may help, but they should be tested carefully. Some finishes change color or reduce contrast. That uncertainty matters. Check the engraving periodically, because preservation is an ongoing task, not a one-time finish.