How to Set Up Router Tables for Perfect Woodworking Projects
Setting up router tables is an essential step for achieving precision and excellence in woodworking projects. A router table transforms a handheld router into a stationary, versatile tool that opens up a world of creative possibilities. From shaping edges to hollowing out sections, mastering the setup of these tables is key to ensuring clean cuts and intricate designs.
In this guide, we will explore the crucial aspects of setting up router tables effectively. Understanding the components, calibrating the settings, and choosing the right materials will elevate your woodworking skills and lead to more professional results. Whether you are a seasoned woodworker or just beginning your journey, knowing how to set up these tables optimally can profoundly impact your project outcomes. Prepare to dive into the world of router tables and enhance your woodworking experience like never before.
Understanding the Basics of Router Tables in Woodworking
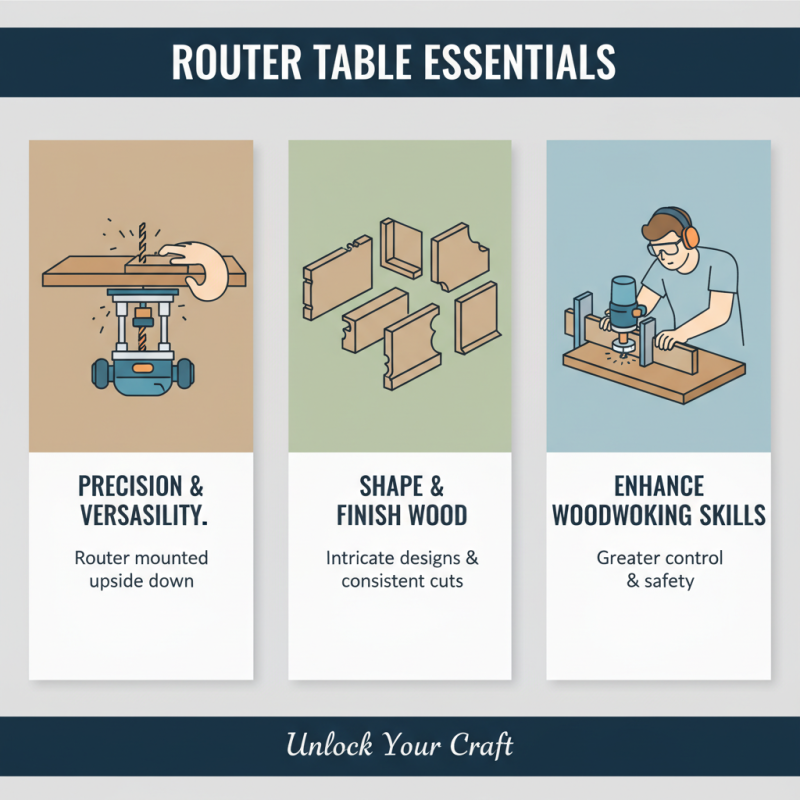
Understanding router tables is essential for anyone looking to enhance their woodworking skills. A router table is a power tool setup that allows for precision and versatility in shaping and finishing wood pieces. By securely mounting a router upside down, woodworkers can guide the material against the bit, enabling them to execute intricate designs and consistent cuts that might be difficult to achieve by hand.
The basic components of a router table include the table surface, the fence, and the router itself. The flat surface provides a stable platform for workpieces, while the fence ensures straight cuts and helps to control the depth of the routing process. Additionally, the height of the router can be adjusted for different projects, allowing for various profiles and depths of cuts. Understanding these fundamentals sets the stage for successful woodworking, as mastering router tables can transform mundane tasks into crafting opportunities filled with creativity and precision.
Essential Tools and Materials Needed for Setting Up Router Tables
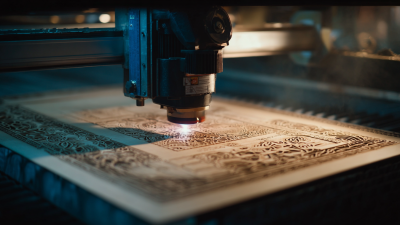
Setting up router tables is essential for achieving precision in woodworking projects. To get started, you will need several key tools and materials. A sturdy router table serves as the foundation; it should be flat and stable to support various woodworking tasks. Additionally, a router is indispensable, ideally featuring adjustable speed settings to accommodate different materials. Clamps, push blocks, and feather boards enhance safety and precision while working on your projects.
According to a report by the Woodworking Machinery Manufacturers of America, over 70% of professional woodworkers consider router tables crucial for their operations, citing enhanced accuracy and efficiency. Dust collection systems are also important; they help maintain a clean workspace and ensure better visibility during detailed work.
Tips: Always ensure the router bit is sharp and properly secured before starting. Periodically check your setup for any loose components to avoid accidents. Consider investing in additional accessories such as insert plates and dado sets to expand your router table's capabilities. This proactive approach will not only improve the quality of your woodworking projects but also extend the life of your tools.
Step-by-Step Guide to Assembling Your Router Table
Setting up a router table can significantly enhance the precision and efficiency of your woodworking projects. To begin assembling your router table, choose a sturdy flat surface that can support the weight of the router and any materials you will be working on. Ensure that you have all the necessary components, including a router, a mounting plate, and the table itself. Follow the manufacturer’s instructions carefully to secure the router to the table in a way that allows for safe and effective operation.
As you progress with the assembly, make sure to adjust the height of the router for optimal cutting depth. This can be crucial for different types of wood and desired cuts. A tip to remember is to make test cuts on scrap wood before using your chosen material. This helps to guarantee accuracy and avoid costly mistakes. Additionally, when connecting the power supply, ensure that all electrical components are properly installed to prevent any hazards during use.
Finally, equip your router table with essential accessories like feather boards and push sticks to enhance safety and control while working. These tools can help maintain steady pressure on the wood and minimize the risk of kickback. Take your time during the setup process, and always prioritize safety to enjoy a smooth workflow in your woodworking endeavors.
Adjusting the Router Table for Precision Cuts
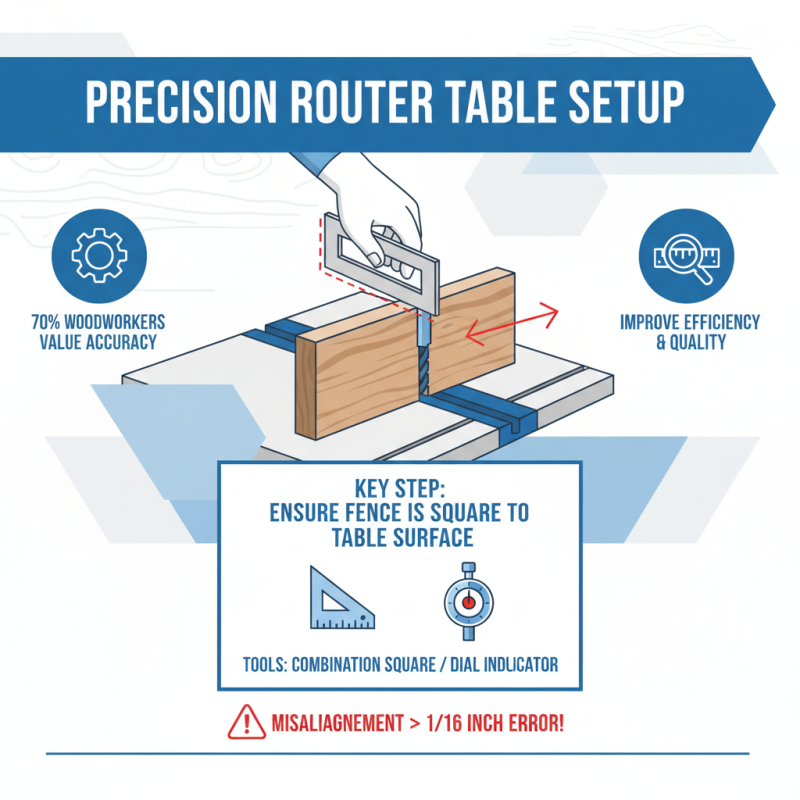
Adjusting a router table for precision cuts is crucial for achieving high-quality results in woodworking projects. According to a report from the Woodworking Industry Association, nearly 70% of woodworkers noted the importance of accurate setup for enhancing both efficiency and the quality of their work. When setting up your router table, ensure that the fence is square to the table surface. This can be achieved using a combination square or a dial indicator, which are vital tools for verifying alignment. Inaccurate setups can lead to significant discrepancies; even a slight misalignment can result in cuts that are off by as much as 1/16 inch, impacting the overall integrity of your project.
Another key aspect to consider is the height adjustment of the router bit. Professional woodworkers advocate for the use of height gauges, which allow for precise control over bit depth. A study by the American Woodworking Institute highlighted that projects requiring detailed joinery saw a 30% improvement in accuracy when utilizing properly adjusted router tables. Furthermore, maintaining consistent feed rates during cuts contributes to smoother finishes and reduces the likelihood of burn marks on the wood. By meticulously adjusting both the fence and bit height, woodworkers can enhance the accuracy of their cuts, ultimately leading to more successful and professional-looking woodworking projects.
Safety Tips for Using Router Tables Effectively
Using router tables can significantly enhance the quality of woodworking projects, but safety should always be the top priority. Before starting any work, ensure you have a clear understanding of the equipment and its functions. Always wear appropriate personal protective equipment, such as safety glasses and hearing protection. It’s also advisable to use a dust mask to avoid inhaling wood particles. Keeping the work area clean and organized will help prevent accidents, allowing you to focus on the task at hand.
When setting up your router table, check that all safety devices are in place and functioning correctly. This includes ensuring that the router bit is securely attached and that guards are properly adjusted. Always feed the wood into the router table against the direction of the bit's rotation. This technique not only gives you better control but also minimizes the risk of kickback, which can be dangerous. Never reach over the blade while the router is running, and always keep your hands at a safe distance from the cutting area. By following these safety tips, you can use router tables effectively and create beautiful woodworking projects without compromising on safety.